Configure Bank Statement Import through Data Exchange Definition Part 2
Hello Readers,
This blog is second part to the blog on Configure Bank Statement Import through Data Exchange Defination Part 1 (dhirennagar.blogspot.com)
In this blog we are going to see a little more complex Bank Statement Import process.
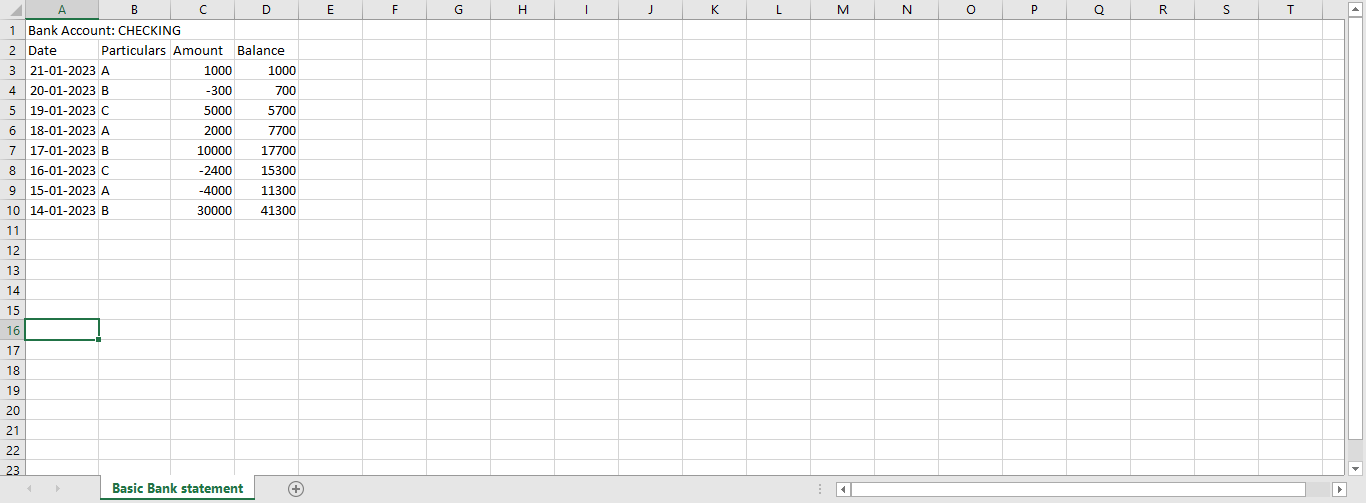
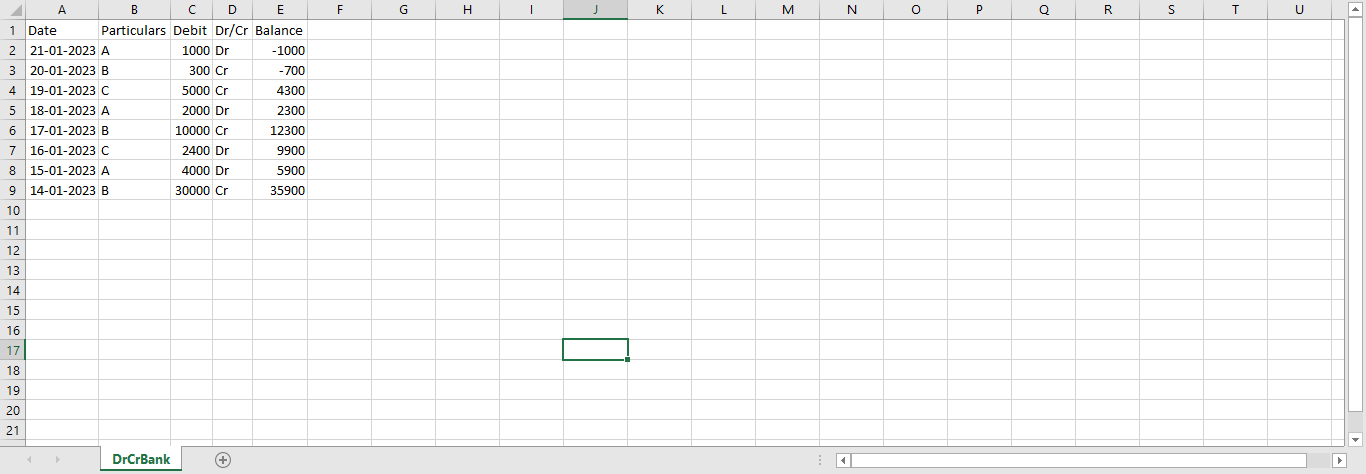
In below screenshot you can see a Bank Statement with Debit & Credit Columns which we need to configure for import.![]()

Now first we need to create Data Exchange definition for the same. In this blog we will create it manually as wizard method is not capable to handle this case. Go to Data Exchange Definition page and click on new. You can keep any code and name. Because we will import CSV file, file type should be Variable Text and Column Separator set as Comma . Other details will be as shown below.

After this we need to configure column setup. For this needs to specify Line Definitions and Columns Definitions. Our file has 5 columns with Date, Particulars, Debit, Credit and Balance so setup will be as follows. For Date we need to provide Date format. For Date and Decimal we need to specify the formatting culture, in our case specify it as en-US.

As a next step we need to specify the mapping of these fields. Mapping here means we need to inform system that data from these columns needs to be transferred to which table and which fields.
To do this in Line Definition click on Manage - Field Mapping. On next page click on New to create new Field Mapping. As we are preparing to import data in Bank Reconciliation lines select table 274 and mapping codeunit as shown in below screenshot.
You also need to specify Columns and fields mapping to import data. This needs to be done only for those columns you want to import. In our case Balance columns is not important hence we will not specify field mapping for it. Overwrite value field specifies if the data imported will be replaced by other value or not, in our case Statement amount field will be replaced so keep Overwrite value Boolean true. Multiplier is used to multiply the amounts that are imported. As Credit amounts needs to be imported as negative, we kept multiplier as -1. Transformation rules can be used to manipulate the data imported before it is transferred to table.

We need to link our Data Exchange definition to Bank Export/Import setup. You can keep any Code and Name. Set Data Exch Def code as the one you just created and other values as shown in below screenshot.

Setup is ready so assign this setup to the relevant bank account for which you want to import the statement. Now go to Bank Account reconciliation and try to import the CSV file. As you can see in below screenshot values are imported properly.

I hope this blog will be useful to configure complex Bank Statement. There is more to Data exchange definitions. I will create more blogs to explain this very useful functionality.
Till than Happy Learning !!

Hello, thanks for the nice post on Bank Reconciliation.
ReplyDeleteIn my case it's not working, did u apply any transformation formula as well.
Hello Shahid, Thanks for the comment. Yes, I have applied transformation rule to trim the spaces in the data. If your data in import file does not have spaces you do not need transformation rule for this to work. Just following above steps will do the trick.
DeleteIf you still face any issue connect me on LinkedIn - https://www.linkedin.com/in/ca-dhiren-nagar-5079081b2/