Configure Bank Statement Import through Data Exchange Definition Part 1
Hello Readers, Greetings to you.
Time for new blog and new learning!
In this blog I am going to showcase you the process to configure Bank Statement Import functionality in Business Central through Data Exchange Definition.
In Business Central when user is required to perform Bank Reconciliation process, user needs to enter bank statement lines manually. There is an option of "Suggest Lines", but it will just copy the Bank Account ledger entries on Bank Statement lines. If there is any difference in bank statement and Bank Account ledger entries, then user needs to manually enter, delete or change the amount as needed to post the reconciliation.
Through Bank Statement Import setup you can import CSV file of bank statement that is provided by your bank directly into Business Central. This functionality is available in both Bank Account Reconciliation and Payment Reconciliation Journal pages. User can decide which of the two methods to use for posting reconciliation.
Business Central supports very basic to advance level of Bank Statement Import. You can configure it through Data Exchange Definition and Bank Import/Export Setup page. In this blog, I will show you how to configure a basic Bank Statement Import through Wizard function.
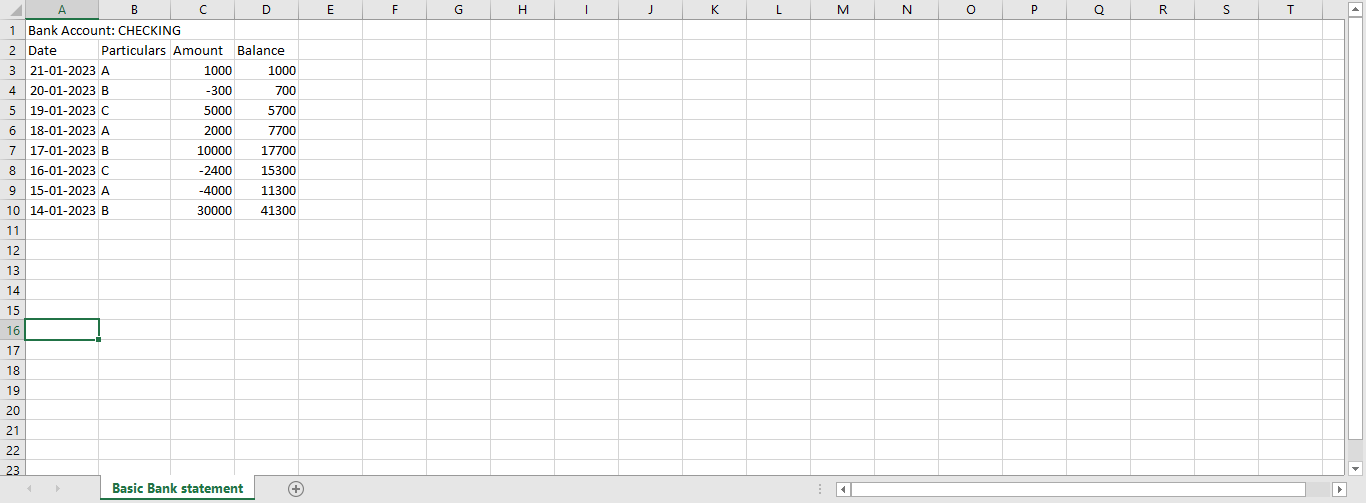
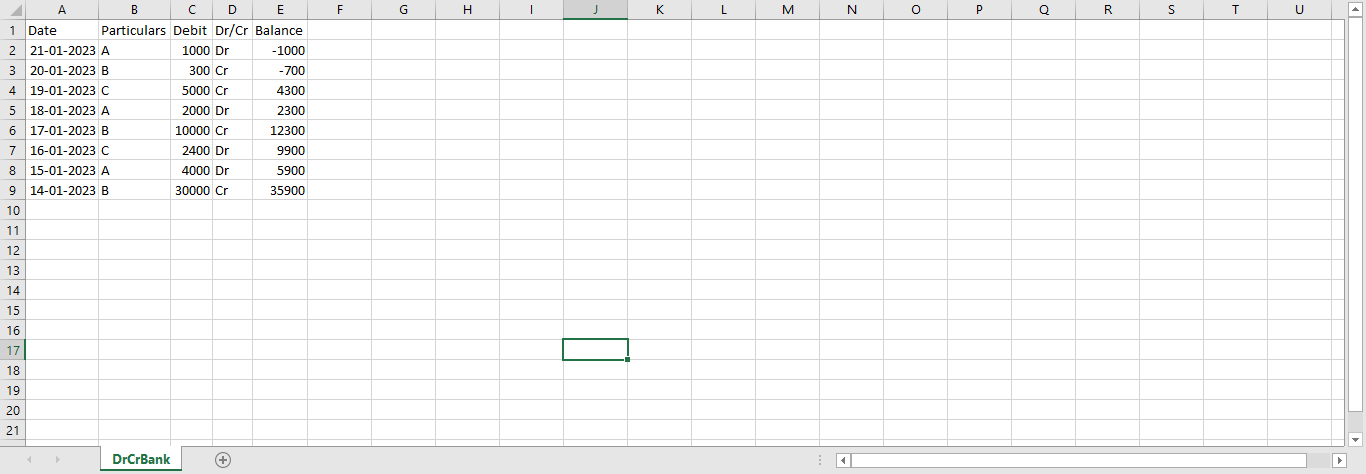
In below image you can see I have a very basic bank statement in CSV format.
In Business Central now search for Bank Import/Export Setup. It will open the below page.
In action click on Bank Statement file format wizard. It will open below page.

Click on Upload a bank statement file and upload the CSV file of your bank statement.

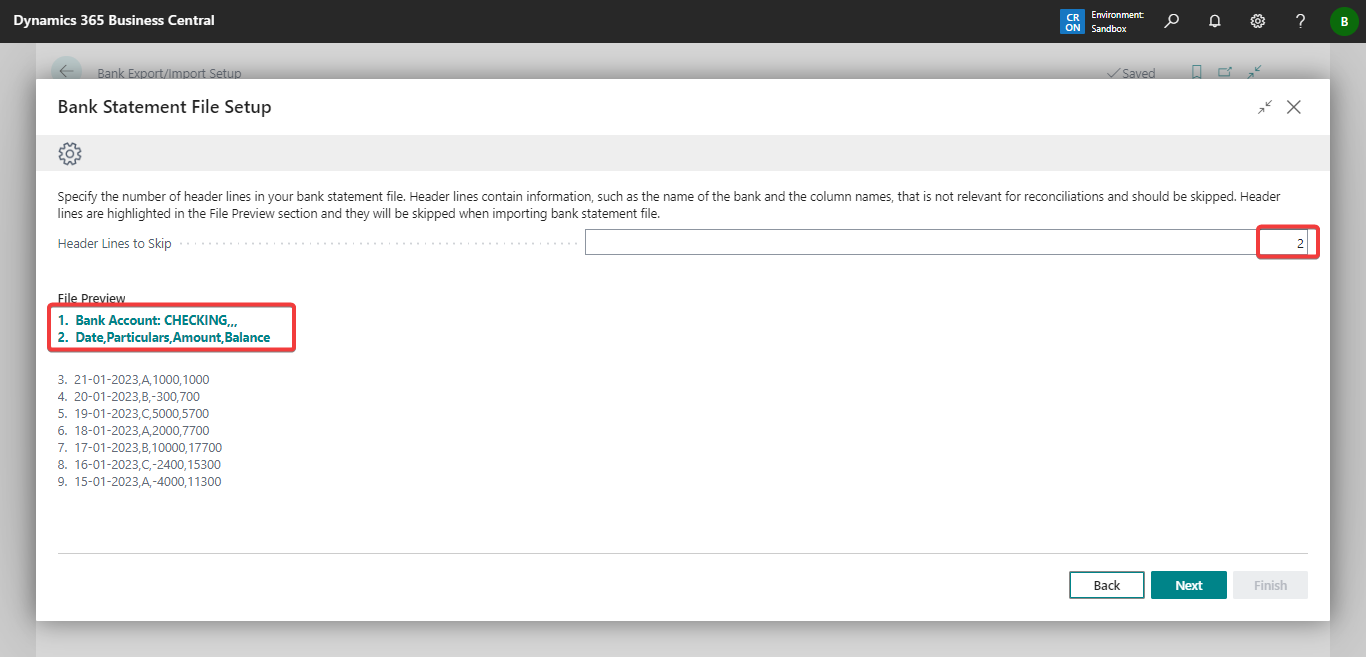
System will ask you how many header lines you want to skip. Header lines are lines that contains additional details other than transaction details. For e.g., in our case, we have 2 header lines, first is bank account name and second line is of captions. Enter 2 as header lines and click Next.


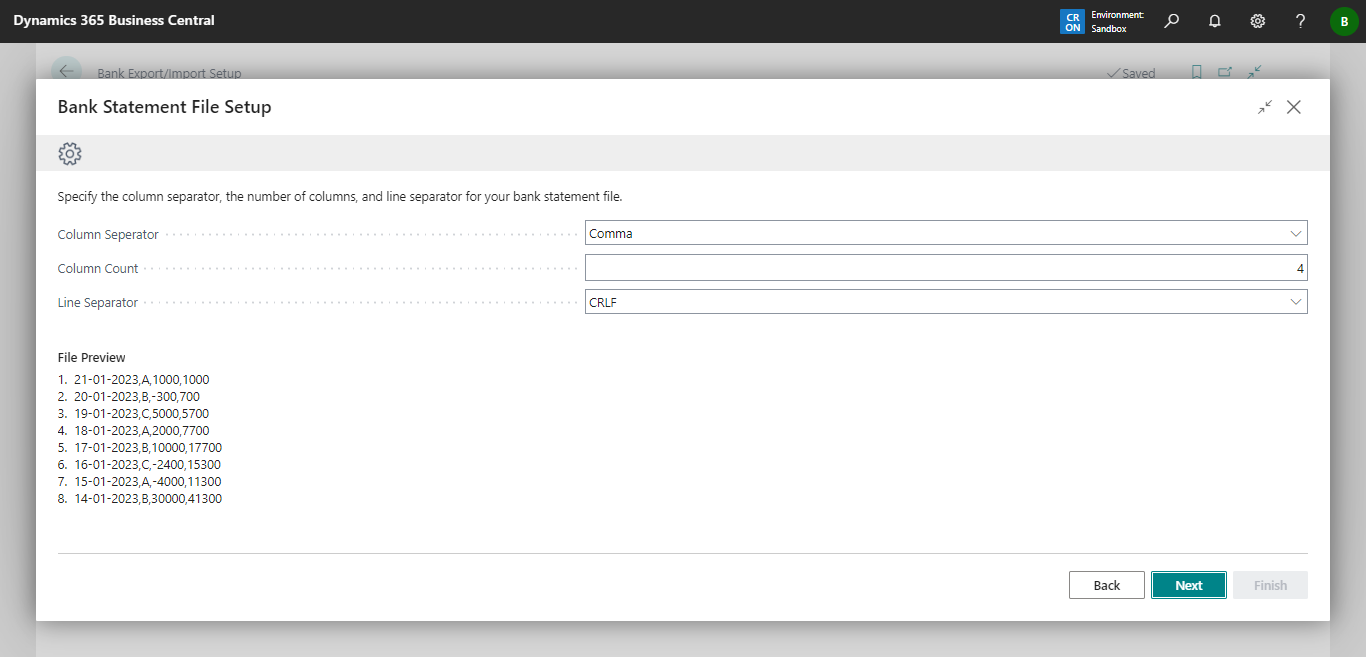
You need to specify the column separator, in our case it is Comma (","), also specify number of columns, in our case we have four columns. Click Next.


In next page specify which column no. has Dates, Descriptions and Amounts. Through this data system will identify from which column system will import Date, Description and Amount values.

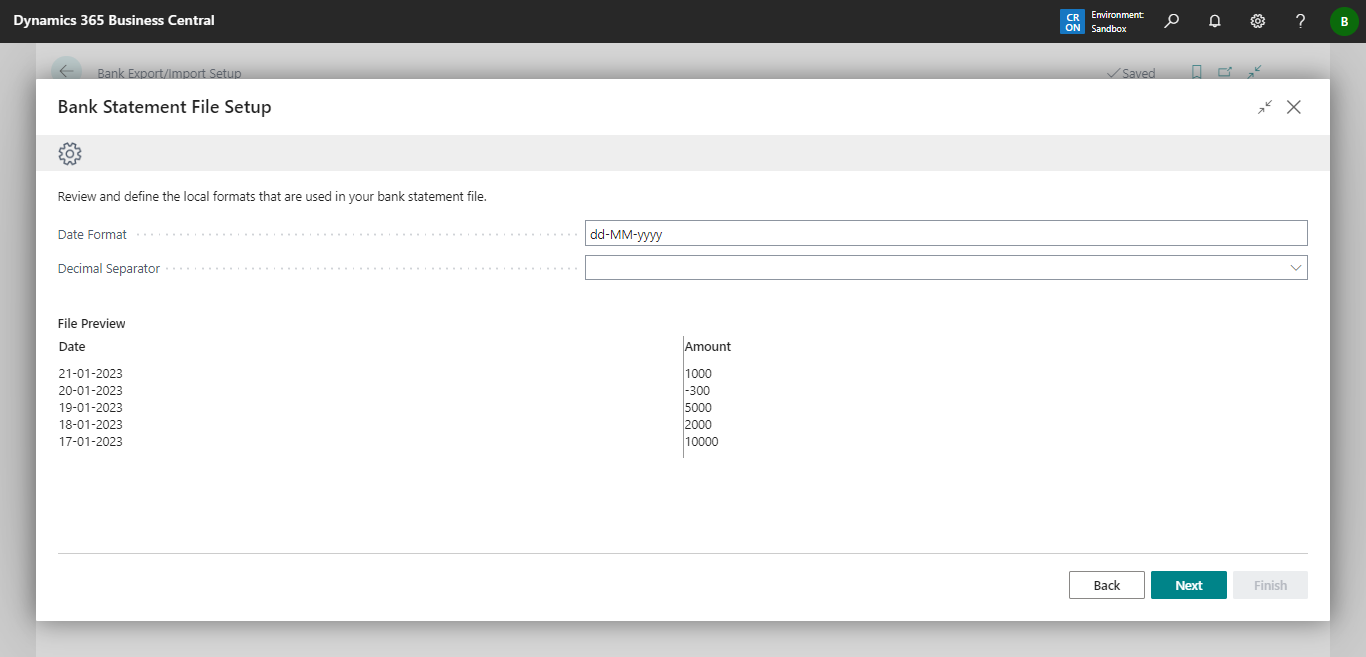
In next screen you will be asked for date format. You need to specify in which format dates are specified in your bank statement.
Now system will create a format code, you need to select to which bank account you want to assign this setup.

Now go to Bank Account Reconciliation page and select Bank Account. In Action select Import Bank Statement option and select the CSV file.

System will import all the lines to Bank Statement line section. Now you can proceed with Bank Account Reconciliation process. To learn more about Bank Reconciliation process you can check Microsoft learn link - Reconcile Bank Accounts - Business Central | Microsoft Learn.

In this blog we have seen a very basic setup of Import Bank Statement. When bank statement is more complex or has many columns, like debit credit amount columns, sign column of Dr/Cr, when there are blank spaces in your statement which are unnecessary or you want to import, or when you want to import details like check(cheque) no., the wizard option is not capable to create proper setup. We will see how we can configure more complex setup in next few blogs.
This blog will help users and consultants to automate Bank Statement Import process. This will reduce the efforts of users to change, add or delete bank statement lines. Please share it with your colleagues and let them know about this very useful functionality.
Thank you for your valuable time. Happy Learning!

Comments
Post a Comment